JirAI: Work with Jira issues
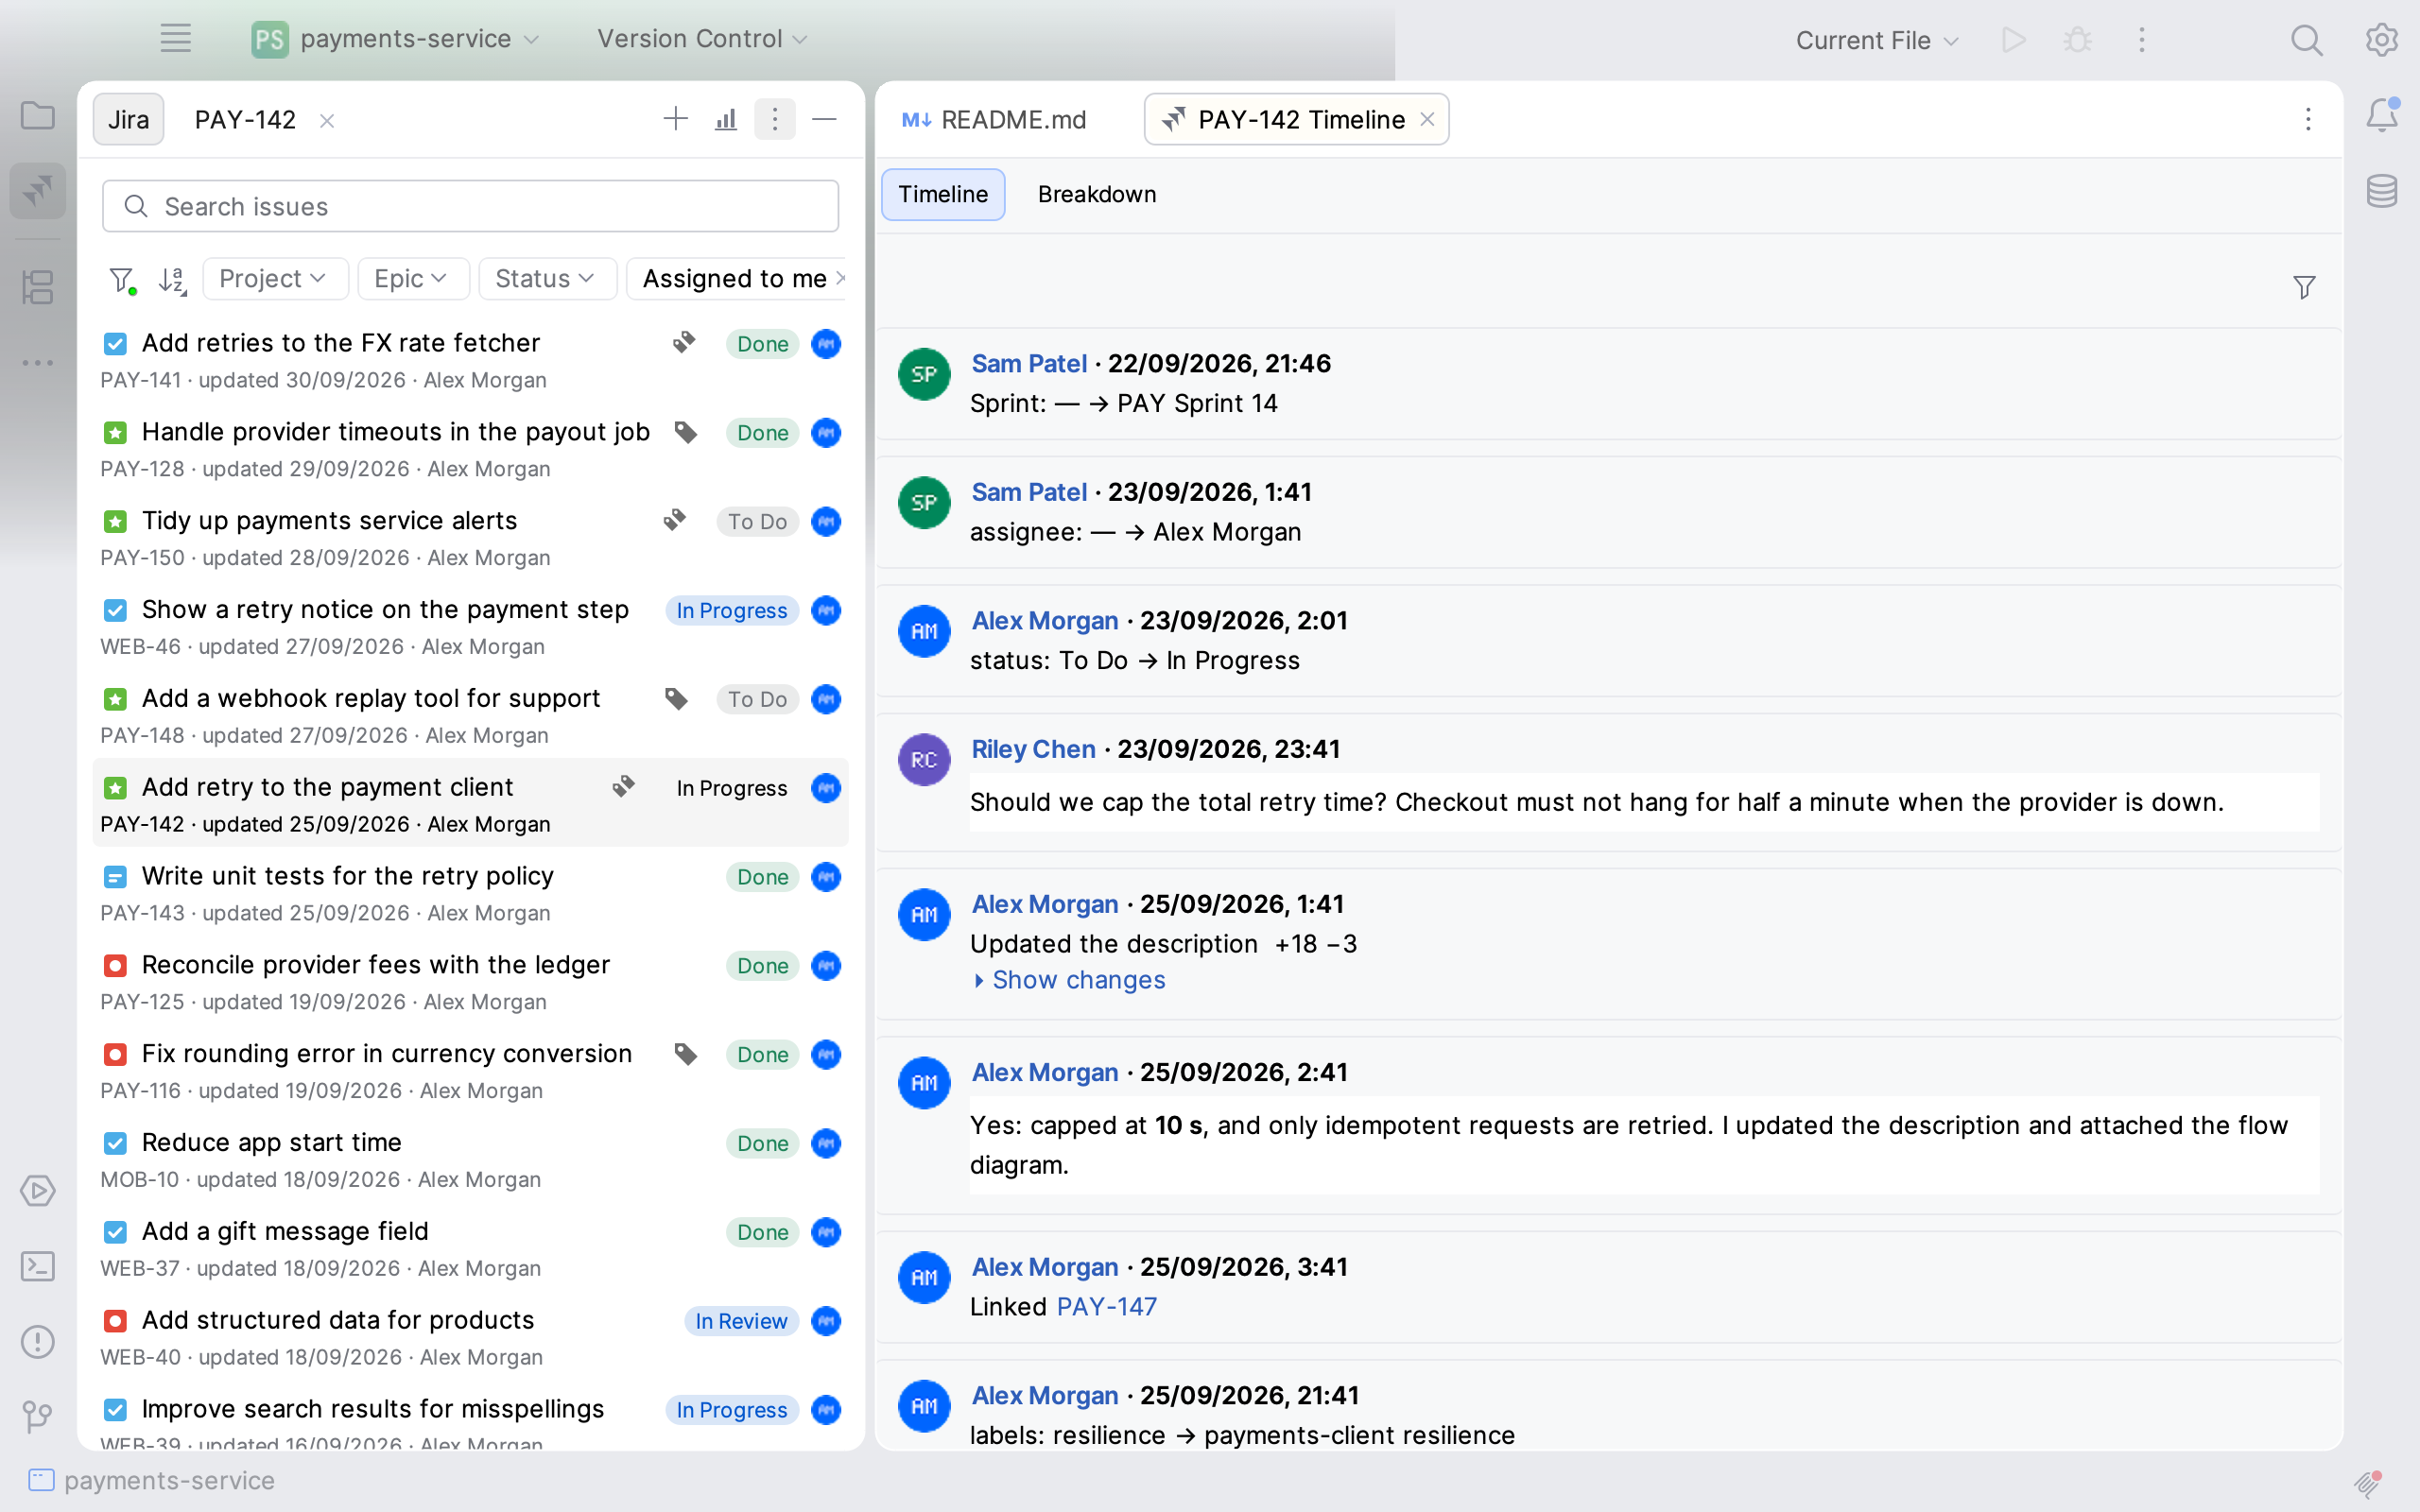
The JirAI tool window lists your Jira issues next to your code.
Use it to find an issue, open its details and timeline, and run common actions on it.
In JirAI, issue and work item mean the same thing: Jira Cloud calls issues work items in its newer screens, and some JirAI views use that term too.
The JirAI tool window
The JirAI tool window opens on the left side of the IDE.
On the IDE start screen, where no project is open, click More on the left tool window bar and choose JirAI.
Its Jira tab holds the issue list, and each issue you open adds a details tab named after the issue key.
The tool window title bar has two buttons:
- + (New Issue)
Opens the Create form. See Create issues.
- Space Summary
Opens a Jira space with its summary, board, list and reports. See Spaces.
Search and sort
Type in the Search issues field to match issue text.
Type an issue key on its own, for example
DEMO-123, to find that issue whatever its age.The issue must still match the other active filters.
Click Sort By (the sort icon) and choose Updated, Created or Priority.
Toggle Descending in the same menu to reverse the order.
More issues load as you scroll down the list.
Filter the list
Apply a quick filter
Click Filters (the funnel icon) above the list.
Under Quick Filters, choose Assigned to Me, Unassigned or All Issues.
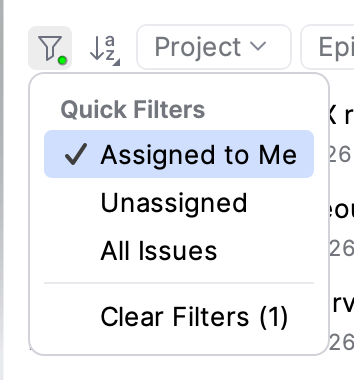
The first time you open the tool window in a project, the list uses the Assigned to Me quick filter and shows the most recently updated issues first.
To see other people's issues and unassigned issues too, choose All Issues.
To narrow the list further, use the filter chips: Project, Epic, Status, Assignee, Reporter, Type and Priority.
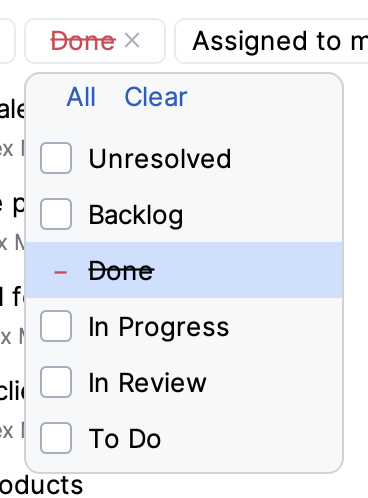
Click a value once to include it.
Click it a second time, or Shift+click it, to exclude it; the chip then reads not followed by the value.
Use All and Clear at the top of a chip popup to select or clear every value.
The Status popup also offers Unresolved.
Assignee and Reporter accept several people.
The Assignee and Reporter popups have Clear but no All.
You are pinned on top, under Unassigned and above a divider.
To remove every filter, choose Clear Filters in the Filters menu.
When nothing matches, the list shows Nothing matches the filters. with a Clear filters link.
JirAI remembers the filters and sort order for each IDE project.
Open an issue
Select an issue and press Enter, or double-click it.
JirAI opens the issue's details tab in the tool window and its Timeline tab in the editor.
See Issue details and Timeline and breakdown.
Issue actions
Right-click an issue in the list to open its context menu:
- Open Details
Opens the details tab and the Timeline tab, as Enter does.
- Open in Browser
Opens the issue on your Jira site.
- Copy Issue URL
Copies the issue's Jira link, for example
https://demo-org.atlassian.net/browse/DEMO-123, to the clipboard.- Copy Issue Key
Copies the issue key, for example
DEMO-123, to the clipboard.- Create Branch…
Creates a Git branch for the issue. See Create a branch from an issue.
- Refresh
Reloads the list from Jira. It uses the IDE's Refresh shortcut, which you can look up in .
- Delete
Deletes the issue after a confirmation. See Delete an issue.
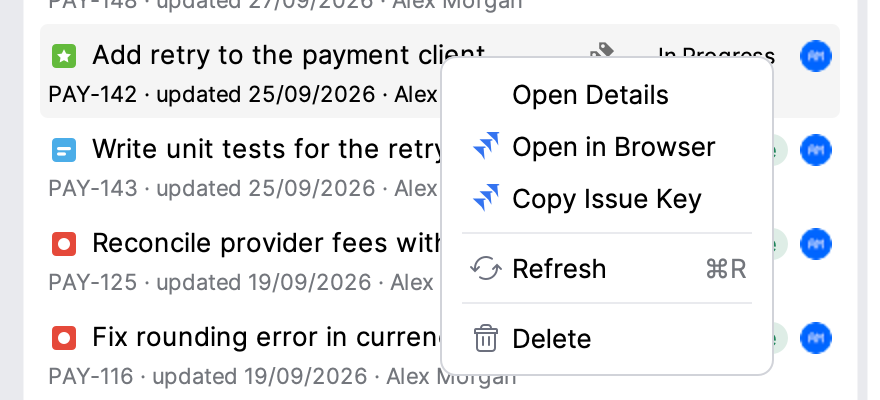
The issue lists in a space's List tab and in an issue's Breakdown tab have the same menu.
Delete an issue
Delete an issue
Right-click the issue and choose Delete.
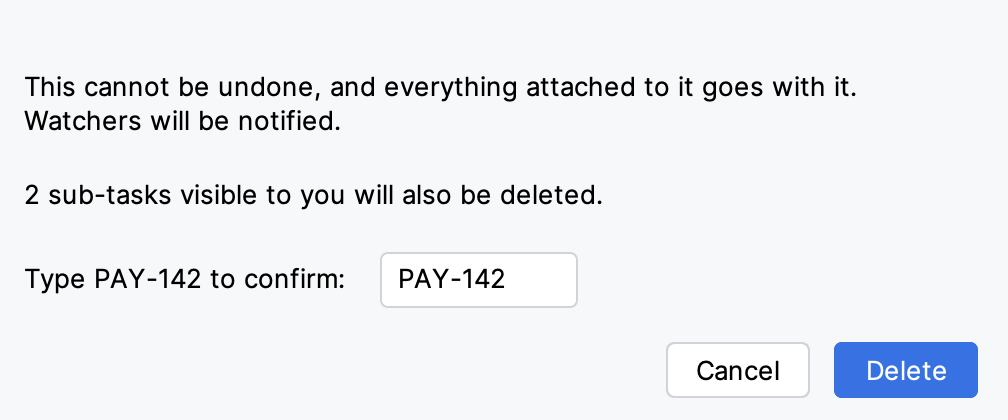
Wait while the dialog checks your permissions and the issue's child work items.
The dialog lists the sub-tasks and other children that would be affected.
Type the issue key in the Type DEMO-123 to confirm: field and click Delete.
Create an issue
Click + in the tool window title bar to open the Create form.
See Create issues.
Create a branch from an issue
JirAI names a Git branch after an issue and opens the IDE's own new-branch dialog.
Create a branch for an issue
Choose Create Branch… in one of these places:
the context menu of an issue in the issue list;
the menu of a card on the board;
the right-click menu of the issue details tab.
In the Create Branch for DEMO-42 dialog, check the suggested name, for example
DEMO-42-fix-login-timeout.Change the name or the Checkout branch option if you need to.
Click Create.
If a branch with the suggested name already exists, JirAI does not open the dialog.
Instead, a notification says so and offers Check Out.
A branch you create without checking it out also gets a Check Out notification.
Move the issue to In Progress
After you check out the new branch, JirAI offers to move the issue to an In Progress status.
The first time, the notification lists every In Progress status the workflow allows, for example In Progress and In Review.
JirAI remembers the status you pick for that Jira project.
The next time, the notification asks Branch created. Move DEMO-42 to In Progress? with Move, Change… and Don't Ask Again.
If the move needs fields, such as a resolution, the notification offers to open the issue.
JirAI makes no offer for an issue that is already in progress or done.
Branch settings
Open to change the following:
Branch name: the name template,
{key}-{summary}by default. It can also use{type}.After creating a branch: Ask to move the issue to In Progress (the default), Move the issue to In Progress or Do nothing.
Forget remembered In Progress targets now.
The template must contain {key}, and names are capped at 60 characters.
See Settings reference.
The current issue in the status bar
When the name of your current Git branch contains an issue key, for example DEMO-42-fix-login-timeout, that issue is the current issue.
The status bar shows the current issue's key with the Jira icon.
Hover over it to see the summary and status.
Click it to open the issue's details tab in the JirAI tool window.
When the project's repositories are on branches for different issues, the widget reads, for example, DEMO-42 +1, and a click lets you choose the issue.
To open the current issue from the keyboard, press Ctrl+Shift+A (macOS: ⌘ ⇧ A) and run Open Current Jira Issue.
The key must belong to an issue on the Jira site you are signed in to.
To hide the widget, right-click the status bar and clear JirAI Current Issue.
The issue key in commit messages
When there is a current issue, JirAI starts an empty commit message with its key, for example DEMO-42.
This works when changelists are on, not with the Git staging area.
JirAI never overwrites a draft commit message or a Git commit template.
When the project's repositories are on branches for different issues, JirAI adds no key.
To turn it off, clear Start commit messages with the current issue key in .