Manage projects hosted on Azure DevOps
Check out a project (clone)
You can clone a repository that you want to contribute to directly from IntelliJ IDEA and create a new project based on it.
In the main menu, go to . If the menu is not available, choose
In the dialog, choose on the left.
Log in to Azure DevOps by pasting your in the field, and click Log In
Select a repository from the list of all Azure DevOps projects associated with your account and the organization that your account belongs to.
In the field, enter the path to the folder where your local Git repository will be created.
Click
If you want to create a project based on these sources, click Yes in the confirmation dialog. IntelliJ IDEA will automatically set Git root mapping to the project root directory.
Jump to the Azure DevOps version of a file
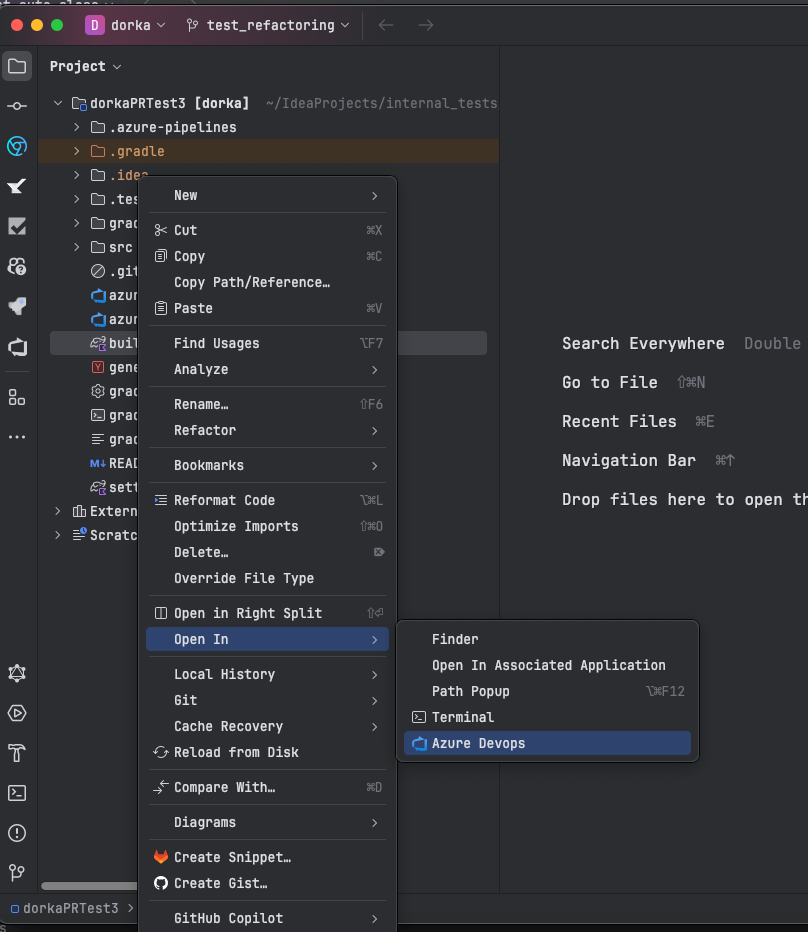
You can jump from IntelliJ IDEA to the Azure DevOps version of a file. IntelliJ IDEA detects which branch is currently active as well as the latest revision of the file, and opens the Azure DevOps copy of the selected file in the corresponding commit in your web browser.
Do one of the following:
Select from the main menu.
Select a file in the editor or in the Project view, and choose from the context menu.

Select the file in the Project view, press , and type ⌘Cmd ⇧Shift A, and type Open on Azure DevOps.
If you are signed in to Azure DevOps, the remote version of the file will open in the browser.
Otherwise:
Enter your Azure DevOps Personal Access Token in the browser window that opens.