Installation
Installing the AZD plugin is straightforward. This guide will walk you through the process of installing the plugin and connecting it to your Azure DevOps account.
For more information on JetBrains plugin installation, refer to the official documentation.
Install the AZD plugin
Open JetBrains IDE.
Open your JetBrains IDE and navigate to the section under the Settings dialog.
Search for Azd Plugin.
Under the tab, type and click the button.
Wait for the installation to complete and restart your IDE when prompted.
You can also install the plugin from the JetBrains Marketplace.
Open the AZD plugin webpage on the JetBrains Marketplace.
Click on the or button and follow the installation instructions.
Generating a Personal Access Token for the AZD Plugin
To properly connect to your Azure DevOps account, you will need to generate a Personal Access Token (A.K.A ) with the following scopes:
vso.build_execute
vso.code_status
vso.code_write
vso.graph
vso.identity
vso.profile
vso.project
vso.test
vso.threads_full
vso.work_write
More details about each scope
REST API Scope Name | Azure DevOps Portal Scope | Description |
|---|---|---|
vso.code_write | Code (Read & write) | Allows the plugin reading and writing code, including cloning repositories and pushing changes. Needed for interacting with the source code in repositories. |
vso.code_status | Code (Status) | Allows the plugin reading and updating the build and release status associated with a commit. Needed for updating pull request statuses and build statuses. |
vso.graph | Graph (Read) | Allows the plugin reading graph data such as users, groups, and memberships. Needed for rendering identity and membership in the UI. |
vso.build_execute | Build (Read & execute) | Allows the plugin reading build definitions and queues, and queuing builds. Needed for triggering and monitoring builds. |
vso.identity | Identity (Read) | Allows the plugin reading identity information, including users and groups. Needed for retrieving user profiles and identity details. |
vso.project | Project and Team (Read, write, & manage) | Allows the plugin managing projects and teams. Needed for interacting with project-level data, settings, and policies. |
vso.threads_full | Pull Request and Threads (Read & write | Allows the plugin full access to code discussions and comments (threads) in pull requests. Needed for managing comments and discussions on code and pull requests. |
vso.profile | Profile (Read) | Allows the plugin reading your profile information. Needed for displaying user profile details within the plugin. |
vso.work_write | Work Items (Read & write) | Allows the plugin reading and writing work items. Needed for creating and updating tasks, bugs, and other work items. |
vso.test | Test Management (Read) | Allows the plugin reading test plans, suites, cases, and results. Needed for accessing test management features and data. |
PAT Accessibility
You can now restrict the to a specific organization, and the plugin will work as expected.
Due to an unresolved issue with the Microsoft Azure DevOps team, you must create the PAT with the option set to .Otherwise, the plugin will not be able to authenticate with the Azure DevOps server.
Connect to Azure DevOps
Now that the IDE is running with the plugin, and you have your ready, you can connect to your account.
You can either from the or from the
Follow the procedure below to connect to your Azure DevOps account.
Login from the Azure DevOps ToolWindow
Open the AZD ToolWindow:

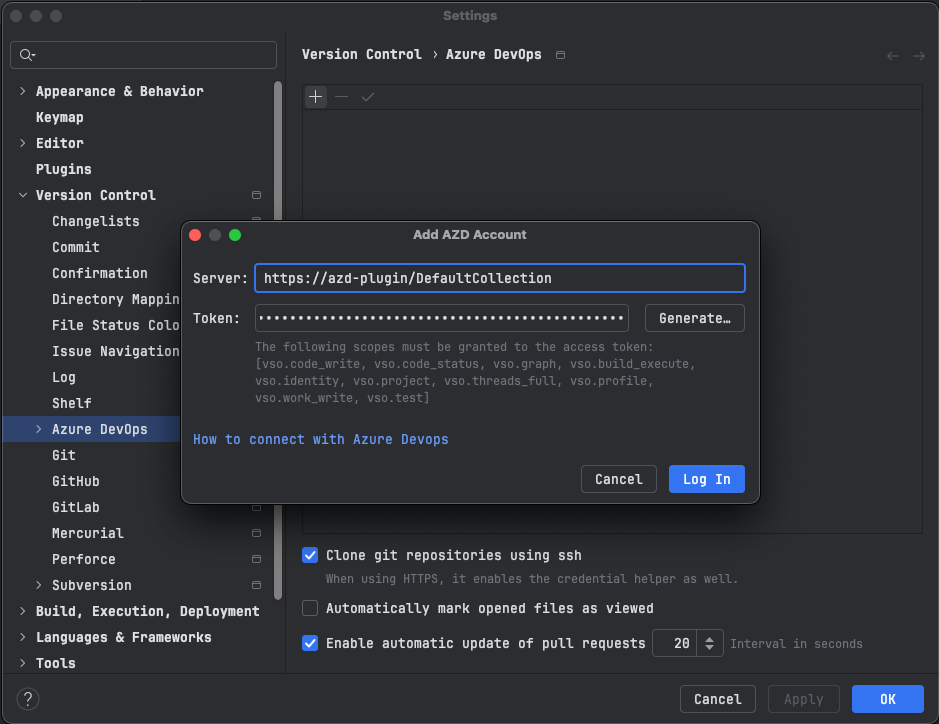
Click on the button to add a new Azure DevOps account.
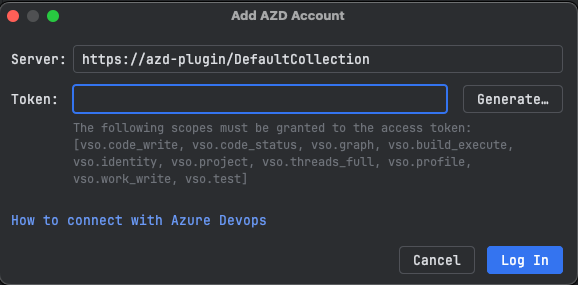
In the Add AZD Account dialog, change the Server URL if needed, and paste your personal Token.
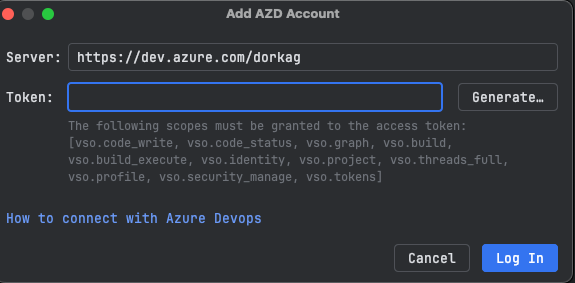
Login from Azure DevOps Settings
Navigate to:
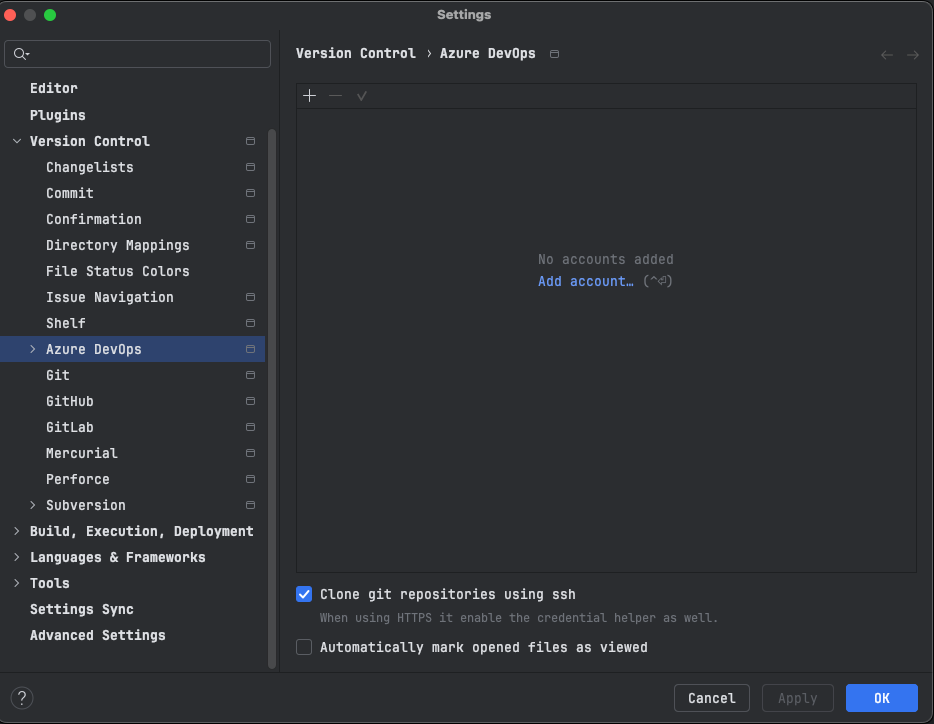
Click on
button to add a new Azure DevOps account.
In the dialog, set the url and add your personal token.
Login from the Azure DevOps ToolWindow
Open the AZD ToolWindow:

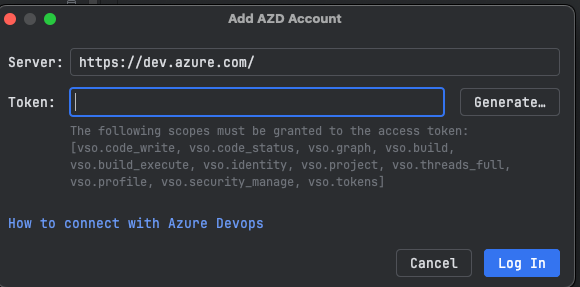
Click on the button to add a new Azure DevOps account.
In the Add AZD Account dialog, change the Server URL if needed, and paste your personal Token.
Login from Azure DevOps Settings
Navigate to:

Click on
button to add a new Azure DevOps account.
In the panel set the url and your secret PAT.
